
How To Activate USB Ports on Dell Monitor [Quick Steps 2024]
Your Dell monitor has a secret superpower, and it’s all about those USB ports you see. They’re like hidden doors to making your computer life better. But wait, they still need to be turned on! Learn how to activate USB ports on Dell Monitor easily and connect your devices hassle-free. This guide will show you the easy steps to make your Dell monitor’s USB ports work, and you can connect all sorts of stuff like your mouse, keyboard, and more.
Importance of USB Ports [Dell Monitor USB Port Usage]
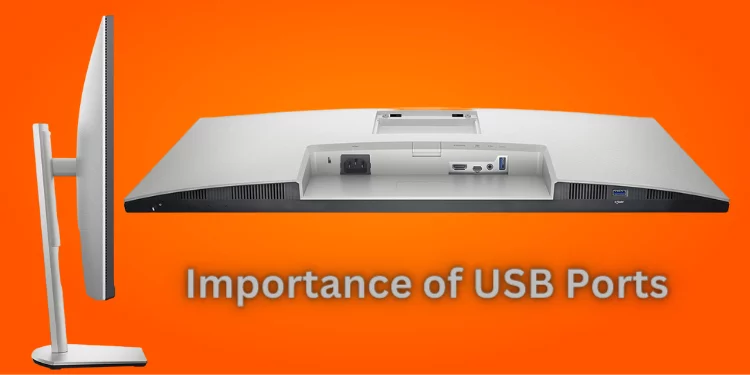
In modern computing, the significance of USB ports cannot be overstated. These unassuming universal serial bus connectors in devices such as your Dell monitor serve as the lifelines of connectivity, bridging the gap between your gadgets and your digital domain.
With the right USB cable, these ports empower you to establish seamless links that amplify your devices’ functionality, delivering an efficient and dynamic user experience.
1. Universal Connectivity via USB Ports
Technology has witnessed a paradigm shift, largely owing to the emergence of Universal Serial Bus (USB) ports. USB ports found on your Dell monitor and other devices have redefined connectivity.
Their role is nothing short of revolutionary, acting as conduits that facilitate effortless communication between your computer and an array of peripherals.
From keyboard and printer to wireless adapters and USB hubs, these ports offer a standardized interface, simplifying how you interact with your digital arsenal.
2. Elevating Dell Monitor Functionality with USB Ports Dell monitors
Those trusty companions of your digital workspace have evolved beyond their display prowess. Equipped with USB ports, they take on a new dimension of functionality. By employing a USB upstream cable, you awaken the latent potential of these ports.
This metamorphosis allows you to connect with many USB devices, from the indispensable mouse and keyboard to the versatile USB hub. Your Dell monitor becomes a connectivity hub, ensuring your workspace remains organized and efficient.
In essence, USB ports are the architects of a harmonious digital landscape. When coupled with the appropriate USB cable, these tiny gateways create pathways that empower you to seamlessly link devices, streamline operations, and embrace a new realm of productivity.
As your Dell monitor integrates these ports into its design, it becomes more than a display screen – it transforms into a dynamic hub that drives your technological endeavors forward.
How To Activate USB Ports on Dell Monitor
These simple steps will get your USB ports working, ready for various devices, and streamline your workflow.
1. Using USB Upstream Cable
You can turn your monitor into a connectivity hub by activating dormant USB ports with the correct USB upstream cable.
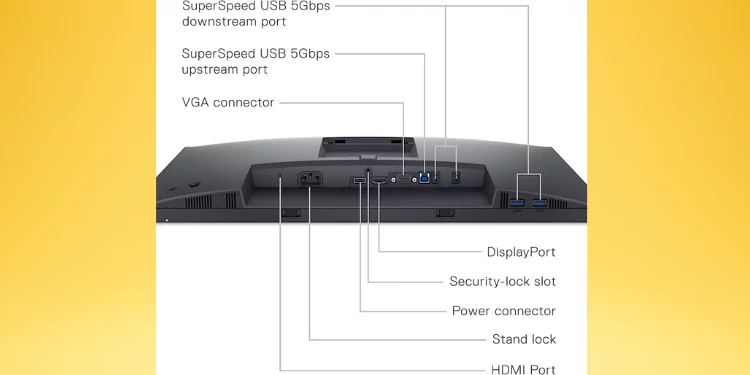
- Check for Compatibility: Ensure your Dell Monitor supports USB activation using the USB upstream cable. Look for the appropriate port on your monitor, usually labeled as the upstream USB port.
- Gather Your Tools: Ensure you have a compatible USB upstream cable. This cable will bridge your computer and monitor, enabling the activation process.
- Turn Off the Monitor: Before you begin, switch off your Dell Monitor. This is essential for safe and successful activation.
- Connect the USB Cable: Connect the USB upstream cable into your monitor’s upstream USB port and securely connect it.
- Connect Your Computer: Connect the USB upstream cable into a free USB port on your computer. This connection establishes the link between your monitor and computer.
- Power Up the Monitor: Turn on your Dell Monitor. The monitor’s USB ports should activate as it boots up, ready to accept USB devices.
- Test the Ports: Plug a keyboard, mouse, or printer into your monitor’s newly enabled USB ports. Check device recognition and functionality.
By following these guidelines, you’re maximizing your Dell Monitor’s USB power. Connectivity is simplified, making handling various devices easy and keeping your workspace tidy.
2. USB Type A & Type B Connection
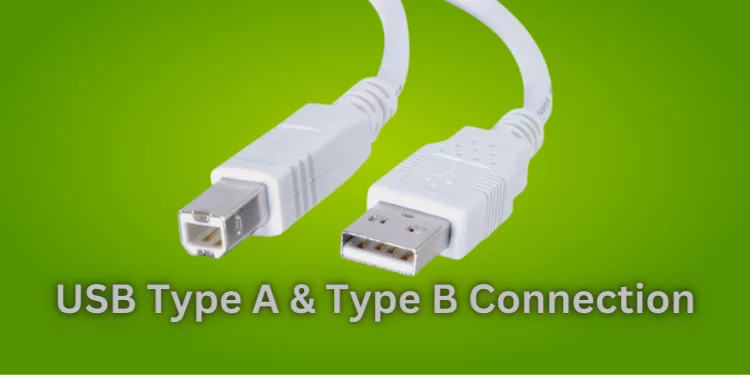
By using both USB Type A & Type B connectors, you’re maximizing the potential of your Dell monitor. This method provides flexibility for different devices and enhances your workspace’s functionality.
Whether managing multiple peripherals or expanding your connectivity options, combining these USB types ensures a seamless and efficient experience.
- Check Compatibility: First, ensure your Dell monitor supports the USB Type A & Type B connection. Look for the USB Type-B port near other cable connectors like HDMI and power.
- Gather the Tools: Ensure you have the necessary tools, including a USB Type-B cable, ready for this process.
- Turn Off Your Monitor: Start by turning off your Dell monitor. This provides a safe environment for making connections.
- Connect the Type-B Cable: Use the Type-B cable to connect the USB cable to your monitor’s Type-B port.
- Connect with Your Computer: Use a free USB port and plug in the Type-A USB cable to connect your computer. The front and back of your PC have these ports.
- Power Up the Monitor: Switch on your Dell monitor. The downstream USB ports should become active and ready for connection as it starts.
- Testing Connectivity: Plug in a USB device like a keyboard, mouse, or printer to your monitor’s newly activated downstream USB ports. Ensure that the device is recognized and functional.
3. Power Management Configuration Check
By managing the power settings, you ensure that your USB ports remain active, ready to connect and power up devices like printers, cables, and other peripherals.
This step is especially relevant for Dell laptops, newer Dell monitors, and other systems where power management might affect the functionality of your USB devices.
- Access Device Manager: Begin by right-clicking the Windows icon and selecting Device Manager. This will open up the hub of device management.
- Locate USB Controllers: Expand the section for Universal Serial Bus controllers. You’ll find the key to unlocking your USB ports’ potential here.
- Activate Power Management Tab: Double-click on the USB Root Hub or the specific hub corresponding to your monitor’s USB upstream port. This will open its properties.
- Navigate to Power Management Tab: Head to the Power Management tab within the properties window. Here’s where the magic happens.
- Adjust Power Settings: Ensure the box next to “Enable the computer to power down this device to conserve energy” is unchecked. This is the essential step to keep your USB ports consistently active.
- Apply Changes: Click OK to apply your changes to the power management settings.
- Repeat for Other Hubs: If multiple USB Root Hubs are listed under Universal Serial Bus controllers, repeat the process for each.
- Restart for Fresh Start: To solidify the changes, restart your PC. This ensures that the updated settings take effect.
4. Disconnect and Reconnect the Power Cord
This method is like giving your USB connections a little pause, allowing them to reset and reestablish their connections. It’s a go-to solution when dealing with minor glitches or connectivity hiccups.
This easy method takes care of your USB ports, makes them work smoothly, and helps downstream ports recognize and interact with USB devices.
- Shutdown Your System: Ensure your system is shut down properly before starting. This provides a safe environment for making adjustments.
- Unplug the Power Cord: Gently disconnect the power cord of your Dell laptop or monitor from the power outlet. This action cuts off the power supply to your device.
- Wait for a Moment: A simple pause can help reset the connections and clear any residual charge.
- Reconnect the Power Cord: Plug the power cord back into the outlet. Ensure it’s securely connected.
- Power Up Your Device: Turn on your Dell laptop or monitor. The monitor and other USB ports should be refreshed and ready as your system boots.
- Test the USB Ports: Connect a USB device to test the USB ports. Check if it’s recognized and functioning as expected.
5. Updating USB Drivers [Dell Monitor USB Ports Not Working]
Updating your USB drivers is akin to giving your USB ports a fresh lease on life. It resolves compatibility issues and ensures your USB devices communicate effortlessly with your system.
Updating USB drivers is essential to keeping data flowing correctly, whether you’re utilizing USB-C or USB-A ports.
- Identify Your USB Device: Find the problematic USB device or port. Please take note of its details.
- Access Device Manager: Select Device Manager from the Windows icon by right-clicking. This is your command center for managing device-related tasks.
- Locate Universal Serial Bus Controllers: In Device Manager, find and expand the section named Universal Serial Bus Controllers.
- Update Driver Software: Right-click on the problematic USB port or device, then select Update Driver Software.
- Automatic Search: The automatic search option lets Windows search for the latest driver updates online. This is where Windows will fetch your device’s most current USB driver.
- Manual Search: You can manually search your computer or the internet for the newest USB driver for your USB port or device if Windows doesn’t automatically find an update.
- Install and restart: Install and restart the update after finding it. This ensures the changes take effect.
FAQs
Can I use a different USB port to activate my Dell monitor’s USB ports?
Utilizing a different USB port on your computer often solves activation issues. Ensure your USB ports are working, and consider adjusting the default settings if needed.
Why aren’t my USB ports working on the Dell monitor by default?
In most cases, the default settings prioritize power conservation, which might result in deactivated USB ports. Check the power management tab in the device manager and ensure that the option to save power is unchecked.
Can I activate USB ports on a Dell laptop like on a monitor?
Yes, the process is quite similar. Whether it’s a Dell monitor or laptop, using a proper USB cable, checking USB ports working, and adjusting the default settings can activate the ports for your USB devices.
Do I need to restart my computer after activating USB ports on the Dell monitor?
Restarting your PC after making changes is recommended to ensure the default settings are properly applied and your USB ports are fully active.
What if my USB ports don’t work after these steps?
If your USB ports are still inactive, consider checking for different USB port options on your computer. Additionally, ensure that all USB cables are securely connected and explore potential solutions for getting your USB ports working optimally.
Conclusion
Activating USB ports on your Dell monitor is a straightforward process that can greatly enhance your connectivity and device integration. Whether using a USB upstream cable or exploring different USB port options, these steps ensure your USB ports work efficiently.
So, why wait? Take advantage of these activation methods and unlock the full potential of your Dell monitor’s USB ports.